Ready to learn Artificial Intelligence? Browse courses like Uncertain Knowledge and Reasoning in Artificial Intelligence developed by industry thought leaders and Experfy in Harvard Innovation Lab.
Welcome to the third installment of Learning AI if You Suck at Math. If you missed the earlier articles, be sure to check out part 1, part 2.
Today we’re going to build our own Deep Learning Dream Machine.
- We’ll source the best parts and put them together into a number smashing monster.
- We’ll also walk through installing all the latest deep learning frameworks step by step on Ubuntu Linux 16.04.
This machine will slice through neural networks like a hot laser through butter. Other than forking over $129,000 for Nvidia’s DGX-1, the AI supercomputer in a box, you simply can’t get better performance than what I’ll show you right here.
- Lastly, if you’re working with a tighter budget, don’t despair, I’ll also outline very budget friendly alternatives.
First, a TL;DR, Ultracheap Upgrade Option
Before we dig into building a DL beast, I want to give you the easiest upgrade path.
If you don’t want to build an entirely new machine, you still have one perfectly awesome option.
Simply upgrade your GPU (with either a Titan X or a GTX 1080) and get VMware Workstation or use another virtualization software that supports GPU acceleration! Or you could simply install Ubuntu bare metal and if you need a Windows machine run that in a VM, so you max your performance for deep learning.
Install Ubuntu and the DL frameworks using the tutorial at the end of the article and bam! You just bought yourself a deep learning superstar on the cheap!
All right, let’s get to it.
I’ll mark dream machine parts and budget parts like so:
- MINO (Money is No Object) = Dream Machine
- ADAD (A Dollar and a Dream) = Budget Alternative
Dream Machine Parts Extravaganza
GPUs First
CPUs are no longer the center of the universe. AI applications have flipped the script. If you’ve ever build a custom rig for gaming, you probably pumped it up with the baddest Intel chips you could get your hands on.
But times change.
The most important component of any deep learning world destroyer is the GPU(s).
While AMD have made headway in cyptocoin mining in the last few years, they have yet to make their mark on AI. That will change soon, as they race to capture a piece of this exploding field, but for now Nvidia is king. And don’t sleep on Intel either. They purchased Nervana Systems and plan to put out their own deep learning ASICs in 2017.
The king of DL GPUs
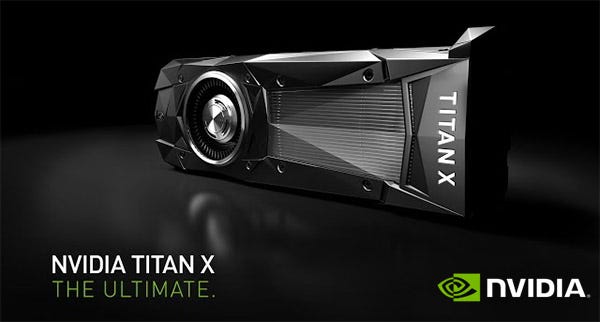
Let’s start with MINO. The ultimate GPU is the Titan X. It has no competition.
It’s packed with 3584 CUDA cores at 1531 MHz, 12GB of G5X and it boasts a memory speed of 10 Gbps.
In DL, cores matter and so does more memory close to those cores.
DL is really nothing but a lot of linear algebra. Think of it as an insanely large Excel sheet. Crunching all those numbers would slaughter a standard 4 or 8 core Intel CPU.
Moving data in and out of memory is a massive bottleneck, so more memory on the card makes all the difference, which is why the Titan X is the king of the world.
You can get Titan X directly from Nvidia for $1,200 MSRP. Unfortunately, you’re limited to two. But this is a Dream Machine and we’re buying four. That’s right quad SLI!
For that you’ll need to pay a slight premium from a third party seller. Feel free to get two from Nvidia and two from Amazon. That will bring you to $5300, by far the bulk of the cost for this workstation.
Now if you’re just planning to run Minecraft, it’ll still look blocky but if you want to train a model to beat cancer, these are your cards. 🙂
Gaming hardware benchmark sites will tell you that anything more than two cards is well past the point of diminishing returns but that’s just for gaming !When it comes to AI you’ll want to hurl as many cards at it as you can. Of course, AI has its point of diminishing returns too but it’s closer to dozens or hundreds of cards (depending on the algo), not four. So stack up, my friend.
Please note you will NOT need an SLI bridge, unless you’re also planning to use this machine for gaming. That’s strictly for graphics rendering and we’re doing very little graphics here, other than plotting a few graphs in matplotlib.
Budget-Friendly Alternative GPUs
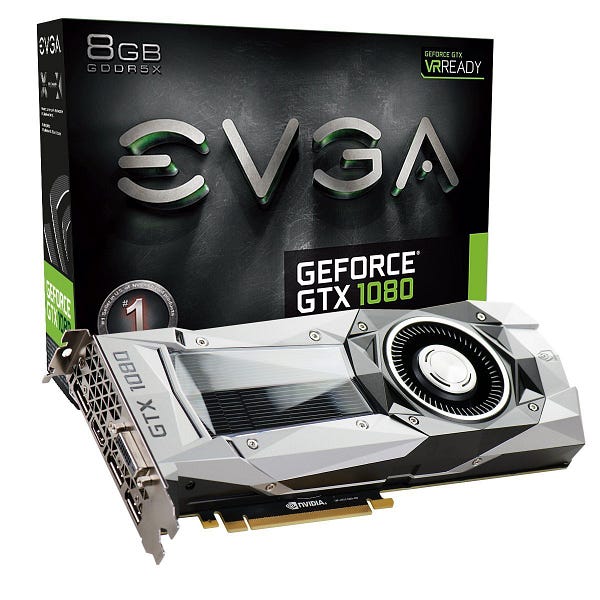
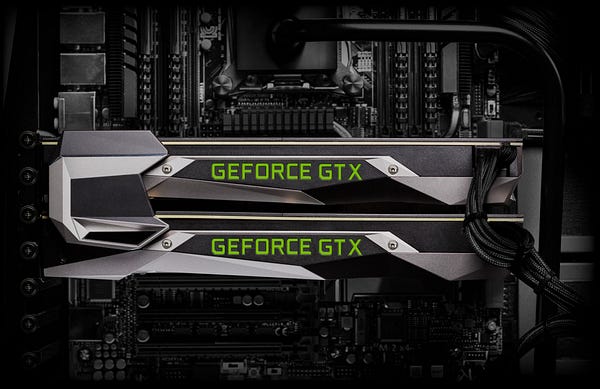
Your ADAD card is the GeForce GTX 1080 Founders Edition. The 1080 packs 2560 CUDA cores, a lot less than the Titan X, but it rings in at half the price, with an MSRP of $699.
It also boasts less RAM, at 8GB versus 12.
EVGA has always served me well so grab four of them for your machine. At $2796 vs $5300, that’s a lot of savings for nearly equivalent performance.
The second best choice for ADAD is the GeForce GTX 1070. It packs 1920 CUDA cores so it’s still a great choice. It comes in at around $499 MSRP but superclocked EVGA 1070s will run you only $389 bucks so that brings the price to a more budget-friendly $1556. Very doable.
Of course if you don’t have as much money to spend you can always get two or three cards. Even one will get you moving in the right direction.
Let’s do the math on best bang for the buck with two or three cards:
- 3 x Titan X = 10,752 CUDA cores, 36GB of GPU RAM = $3800
- 2 x Titan X = 7,167 CUDA cores, 24 GB of GPU RAM = $2400
- 3 x GTX 1080 = 7,680 CUDA cores, 24GB of GPU RAM = $2097
- 2 x GTX 1080 = 5,120 CUDA cores, 16GB of GPU RAM = $1398
- 3 x GTX 1070 = 5,760 CUDA cores, 24GB of GPU RAM = $1167
- 2 x GTX 1070 = 3,840 CUDA cores, 16GB of GPU RAM = $778
The sweet spot is 3 GTX 1080s. For half the price you’re only down 3072 cores. Full disclosure: That’s how I built my workstation.
SSD and Spinning Drive
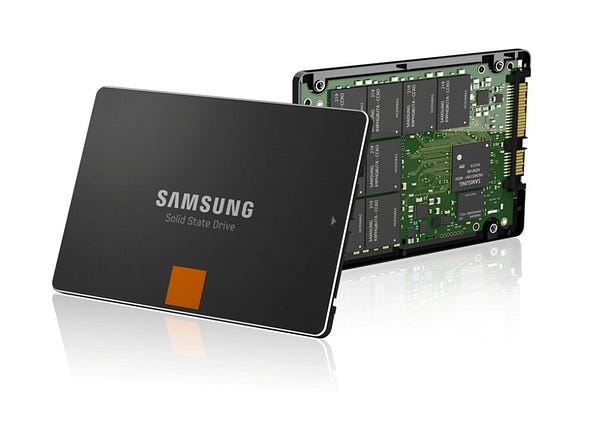
You’ll want an SSD, especially if you’re building Convolutional Neural Nets and working with lots of image data. The Samsung 850 EVO 1 TB is the best of the best right now.Even better, SSD prices have plummeted in the last year, so it won’t break the bank. The 850 1 TB currently comes in at about $319 bucks.
The ADAD version of the 850 is the 250GB version. It’s very easy on the wallet at $98.
You’ll also want a spindle drive for storing downloads. Datasets can be massive in DL. A 4 TB Seagate Barracuda will do the trick.
Motherboard
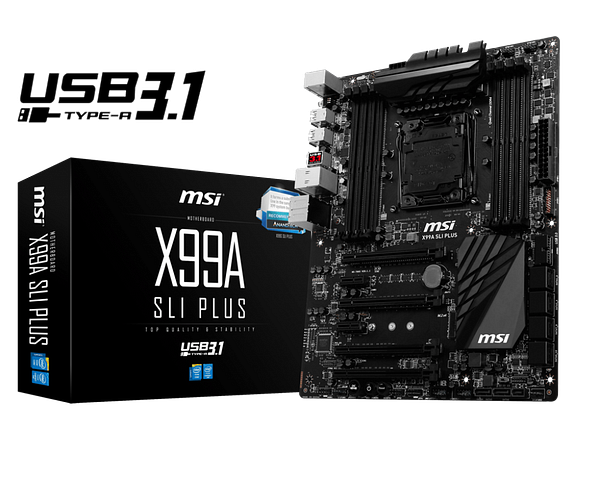
Because we want to stuff four GPUs into this box your motherboard options narrow to a very small set of choices. To support four cards at full bus speeds we want the MSI Extreme Gaming X99A SLI Plus.
You can also go with the ASUS X99 Deluxe II.
If you go with less than four cards you have many more options. When it comes to motherboards, I favor stability. I learned this the hard way building cryptocoin mining rigs. If you run your GPUs constantly they’ll burn your machine to the ground in no time. Gigabyte make an excellent line of very durable motherboards. The X99 Ultra Gaming is absolutely rock solid and comes in at $237.
Case
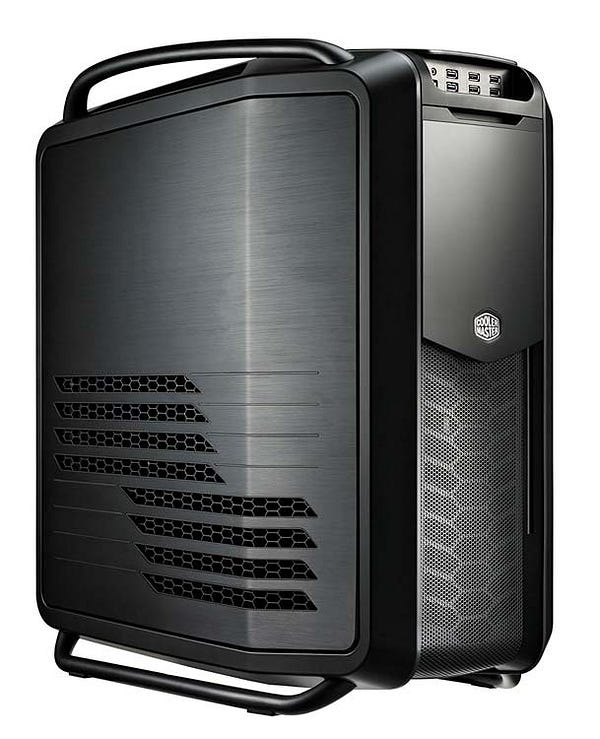
The Cooler Master Cosmos IIis the ultimate full tower case.It’s sleek and stylish racecar design of brushed aluminum and steel make for one beautiful machine.
If you want a mid-tower case, you can’t go wrong with the Cooler Master Maker 5T.
I never favor getting a cheap-ass case for any machine. As soon as you have to open it to troubleshoot it, your mistake becomes glaringly clear. Tool-less cases are ideal. But there are plenty of decent budget cases out there so do your homework.
CPU
Your deep learning machine doesn’t need much CPU power. Most apps are single threaded as they load the data into the GPUs where they do multicore work, so don’t bother spending a lot of capital here.
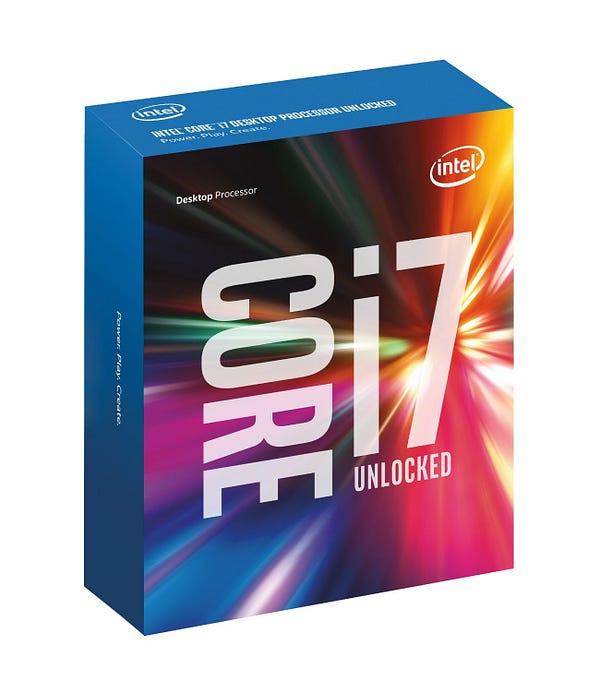
That said, you might as well get the fastest clock speed for your processor, which is 4GHz on the i7–6700K. You can snag it here with a fan. Frankly, it’s ridiculous overkill here but prices have dropped drastically and I was looking for single-threaded performance. This is the CPU to beat.
If you want to go quieter then you can go with watercoolingbut you won’t be running the CPU that hard. Most of the fan noise will come from the GPUs.
There’s no great ADAD alternative here. The i5 at 3.5GHz with a water cooler runs about the same cost as the 4GHz so why bother?
Power
The EVGA Modular 1600W Supernova G2 power supply is your best bet for a quad SLI setup. It will run you about $305 bucks.
The Titan X’s pull about 250 Watts each which brings you to 1000W easy. That doesn’t leave much overhead for CPU, memory, and systems power so go with the biggest supply to leave some head room.
If you’re rocking less cards than go with the 1300W version, which drops the price to a more manageable $184.
Software Setup
Now that we’re done with the hardware, let’s get to the software setup.
You have three options:
- Docker Container
- Virtual Machine
- Bare Metal install
Docker
If you want to go with the Docker option, you’ll want to start with the official Nvidia-Docker project as a foundation. However to really get all of the frameworks, libraries and languages you’ll have to do a lot of installation on top of this image.
You can go with an all-in-one deep learning container, like this one on GitHub.
I wanted to love the all-in-one Docker image, but it has a few issues, no surprise considering the complexity of the setup.
I found the answer to one issue (libopenjpeg2 is now libopenjpeg5 on Ubuntu 16.04 LTS) but I got tired of troubleshooting a second one. I’m still waiting on fixes. If you’re the type of person who likes fixing Dockerfiles and submitting fixes on GitHub, I encourage you to support the all-in-one project.
A second major challenge is that it’s a very, very big image, so it won’t fit on Dockerhub due to timeouts. That means you’ll have to build it yourself and that can take several hours of compiling and pulling layers and debugging, which is about as much time as you need to do it bare metal.
Lastly, it doesn’t include everything I wanted, including Anaconda Python.
In the end I decided to use the all-in-one bare metal tutorial as a guide, while updating it and adding my own special sauce.
Virtual Machine
As I noted in the TL;DR section at the beginning of the doc, you can absolutely upgrade a current gaming machine, add VMware Workstation Pro, which supports GPU passthrough, and have a nice way to get started on a shoestring. This is a strong budget-friendly strategy. It also has several advantages, in that you can easily backup the virtual machine, snapshot and roll it back. It doesn’t start as fast as a Docker container, but VM tech is very mature at this point and that gives you a lot of tools and best practices.
Bare Metal
This is the option I ended up going with on my machine. It’s a little old school, but as a long time sys-admin it made the most sense to me, as it gave me the ultimate level of control.
A few things of note about the software for deep learning before we get started.
You’ll find that the vast majority of AI research is done in Python. That’s because it’s an easy language to learn and setup. I’m not sure that Python will end up as the primary language once AI moves into production but for now Python is the way to go. A number of the major frameworks run on top of it and its scientific libraries are second to none.
The R language gets a lot of love too, as well as Scala, so we will add those to the equation.
Here are a list of the major packages we’ll set up in this tutorial:
Languages
- Python 2.x
- Anaconda (and by extension Python 3.6) — Anaconda is a high-performance distribution of Python and includes over a 100 of the most popular Python, R and Scala packages for data science.
- R — A language and environment for statistical computing and graphics.
- Scala — Scala is an acronym for “Scalable Language.” It’s similar to Java but super high performance and modular.
Drivers and APIs
- Nvidia drivers
- CUDA — A proprietary parallel computing platform and application programming interface (API) model created by Nvidia.
- cuDNN — Deep Neural Network accelerated library of primitives for Nvidia GPUs.
Helper apps
- Jupyter — This is an awesome web app that let’s you share documentation and live code in a single file.
Frameworks/Libraries
- TensorFlow — Google’s OpenSource DL framework that powers things like Google Translate.
- Theano — A robust and popular machine learning framework.
- Caffe — A deep learning framework that comes out of Berkley.
- Torch — A scientific computing framework with wide support for machine learning algorithms that puts GPUs first.
- MXNET — Highly scalable DL system backed by Amazon and several universities.
High Level Abstraction Libraries
- Keras — A high-level neural networks library, written in Python that runs on top of either TensorFlow or Theano.
- Lasagne — A light weight library to build and train neural networks.
Python Libraries
There area whole host of libraries that pretty much any scientific computing system will need to run effectively. So let’s install the most common ones off the bat.
- Pip = an installer and packaging system for Python
- Pandas = high-performance data analysis
- Scikit-learn = a popular and powerful machine learning library
- NumPy = numerical Python
- Matplotlib = visualization library
- Scipy = math and scientific computing
- IPython = interactive Python
- Scrappy = web crawling framework
- NLTK = natural language toolkit
- Pattern = a web mining library
- Seaborn = statistical visualization
- OpenCV = a computer vision library
- Rpy2 = an R interface
- Py-graphviz = statistical graphing
- OpenBLAS = linear algebra
Linux Workstation Setup
For cutting-edge work, you’ll want to get the latest version of Ubuntu LTS, which is 16.04 at the time of writing. I’m looking forward to the days when more of the tutorials cover Red Hat and Red Hat derivatives like CentOS and Scientific Linux but as of now Ubuntu is where it’s at for deep learning. I may follow up with an RH centric build as well.
Get Ubuntu burned to a USB stick via Rufus.
Get it installed in UEFI mode.
First Boot
Your first boot will go to a black screen. That’s because the open source drivers are not up to date with the latest and greatest chipsets. To fix that you’ll need to do the following:
As the machine boots, get to a TTY:
Ctrl + Alt + F1
Get the latest Nvidia drivers and reboot:
- Log into your root account in the TTY.
- Run
sudo apt-get purge nvidia-* - Run
sudo add-apt-repository ppa:graphics-drivers/ppaand thensudo apt-get update - Run
sudo apt-get install nvidia-375 - Reboot and your graphics issue should be fixed.
Update the machine
Open a terminal and type the following:
CUDA
Download CUDA 8 from Nvidia. Go to the downloads directory and install CUDA:
cuda-repo-ubuntu1604-8-0-local.debAdd CUDA to the environment variables:
Check to make sure the correct version of CUDA is installed:
nvcc -V
Restart your computer:
sudo shutdown -r now
Check your CUDA Installation
First install the CUDA samples:
Note that the make section of this command uses +1 to indicate the number of GPUs that you have, so if you have more than one you can up the number and install/compile will move a lot faster.
Run deviceQuery and ensure that it detects your graphics card and that the tests pass:
bin/x86_64/linux/release/deviceQuery
cuDNN
cuDNN is a GPU accelerated library for DNNs. Unfortunately, you can’t just grab it from a repo. You’ll need to register with Nvidia to get access to it, which you can do right here. It can take a few hours or a few days to get approved for access. Grab version 4 and version 5. I installed 5 in this tutorial.
You will want to wait until you get this installed before moving on, as other frameworks depend on it and may fail to install.
Extract and copy the files:
Do a check by typing:
nvidia-smi
That should output some GPU stats.
Python
Now install the rest of the libraries with Pip
pip install seaborn rpy2 opencv-python pygraphviz pattern nltk scrappy
Tensorflow
pip install tensorflow-gpu
That’s it. Awesome!
Test Tensorflow
$ python

...

>>> import tensorflow as tf

>>> hello = tf.constant('Hello, TensorFlow!')

>>> sess = tf.Session()

>>> print(sess.run(hello))

Hello, TensorFlow!

>>> a = tf.constant(10)

>>> b = tf.constant(32)

>>> print(sess.run(a + b))

42

>>>
OpenBLAS
sudo apt-get install -y libblas-test libopenblas-base libopenblas-dev
Jupyter
Juypter is an awesome code sharing format that let’s you easily share “notebooks” with code and tutorials. I will detail using it in the next post.
pip install -U ipython[all] jupyter
Theano
Install the pre-requisites and install Theano.
Yes that’s a capital in Theano.
Test your Theano installation. There should be no warnings/errors when the import command is executed.
python
>>> import theano
>>> exit()
nosetests theano
Keras
Keras is an incredibly popular high level abstraction wrapper that can surf on top of Theano and Tensorflow. It’s installation and usage are so dead simple it’s not even funny.
sudo pip install keras
Lasagne
Lasagne is another widely used high level wrapper that’s a bit more flexible than Keras in that you can easily color outside the lines. Think of Keras as deep learning on rails and Lasagne as the next step in your evolution. The instructions for Lasagne install come from here.
pip install -r https://raw.githubusercontent.com/Lasagne/Lasagne/v0.1/requirements.txt
MXNET
MXNET is a highly scalable framework backed by Amazon. It’s install instructions can be found here. An install script for MXNet for Python can be found right here.
Installing MXNet on Ubuntu
From the website:
MXNet currently supports Python, R, Julia, and Scala. For users of Python and R on Ubuntu operating systems, MXNet provides a set of Git Bash scripts that installs all of the required MXNet dependencies and the MXNet library.
The simple installation scripts set up MXNet for Python and R on computers running Ubuntu 12 or later. The scripts install MXNet in your home folder
~/mxnet.
Install MXNet for Python
Clone the MXNet repository. In terminal, run the commands WITHOUT “sudo”:
git clone https://github.com/dmlc/mxnet.git ~/mxnet --recursive
We’re building with GPUs, so add configurations to config.mk file:
Add it to your path:
source ~/.bashrc
Install MXNet for R
We’ll need R so let’s do that now. The installation script to install MXNet for R can be found here. The steps below call that script after setting up the R language.
First add the R repo:
Add R to the Ubuntu Keyring:
Install R-Base:
sudo apt-get install r-base r-base-dev
Install R-Studio (altering the command for the correct version number):
Now install MXNet for R:
Caffe
These instructions come from the Caffe website. I found them to be a little flaky depending on how the wind was blowing that day, but your mileage may vary. Frankly, I don’t use Caffe all that much and many of the beginner tutorials out there won’t focus on it, so if this part screws up for you, just skip it for now and come back to it.
Install the prerequisites:
Clone the Caffe repo:
USE_CUDNN := 1 in the Makefile:Modify the BLAS parameters value to open:
sed -i 's/BLAS := atlas/BLAS := open/' Makefile.configInstall the requirements, then build Caffe, build the tests, run the tests and ensure that the all tests pass. Note that all this takes some time. Note again that the +1 indicates the number of GPUs to build Caffe with, so up it if you have more than one.
Build PyCaffe, the Python interface to Caffe:
make pycaffe -j $(($(nproc) + 1))
Add Caffe to your environment variable:
Test to ensure that your Caffe installation is successful. There should be no warnings/errors when the import command is executed.
ipython
>>> import caffe
>>> exit()
Torch
Here are the Torch install instructions from the Torch website. I’ve had some struggles with this framework installing but this usually works for most people.
Scala
sudo apt-get -y install scala
Anaconda
Download Anaconda for Python 3.6 right here. It will also have a 2.7.x version as well.
Install it:
sudo bash Anaconda3–4.3.0-Linux-x86_64.sh
Do NOT add it to your bashrc or when you reboot Python will default to Anaconda. It is set to “no” by default in the script but you might be tempted to do it as I was at first. Don’t. You’ll want to keep the default pointed to Ubuntu’s Python as a number of things are dependent on it.
Besides Anaconda let’s you create environments that let you move back and forth between versions.
Let’s create two Anaconda environments:
Activate the 3 environment:
source activate py3
Now let’s install all the packages for Anaconda:
Now we install pygraphviz and the R bridge with pip which aren’t in Conda:
pip install pygraphviz rpy2
Reboot:
sudo shutdown -r now
Install Tensorflow, Theano, and Keras for Anaconda
You’ll install these libraries for both the Python 2 and 3 versions of Anaconda. You may get better performance using the Anaconda backed libraries, as they contain performance optimizations.
Let’s do Python 3 first:
Now deactivate the environment and activate the py2 environment:
source deactivate
Activate the Python 2 environment:
source activate py2
Install for py2:
pip install tensorflow Theano keras
Deactivate the environment:
source deactivate
Now you’re back in the standard Ubuntu shell with the built in Python 2.7.x with all the frameworks we installed for the standard Python that comes with Ubuntu.
Conclusion
There you have it. You’ve purchased a top notch machine or a budget-friendly alternative. You’ve also got it setup with the latest and greatest software for deep learning.
Now get ready to do some heavy number crunching. Dig up a tutorial and get to work! Be on the look out for the next article in my series, which dives into my approach to the Kaggle Data Science Bowl 2017, which races to beat lung cancer for a chance at prizes totaling one million dollars.